Semantic UI – An alternative to Bootstrap?

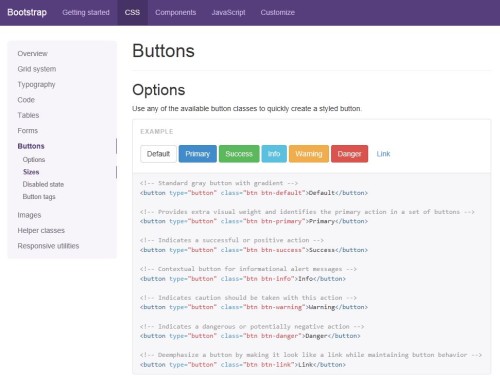
Bootstrap is currently undisputedly the most popular CSS library. I have been using Bootstrap since 2012, starting with version 2.3. The current version is 4.5, with version 5 is under development and expected at the end of this year.

So why is Bootstrap so popular? There are several reasons, but perhaps the most important one is that it is very easy to get started and create attractive webpages, most components you need are available out-of-the-box, and there are  number of different themes to change the visual look of the sites. But perhaps the biggest reason for the popularity is its popularity. There are countless code snippets, samples and plugins available, as well as tutorial and a huge community you can tap into for help. There are currently over 98,000 questions on Stack Overflow for all versions of Bootstrap, and over 21,000 for the latest version.

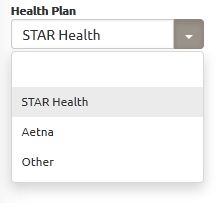
But Bootstrap is of course not unchallenged. There are a number of other CSS frameworks available today, some more complete than others. One interesting framework I recently found is Semantic UI. It uses simple phrases, called behaviors, to trigger functions. Below is an example with a select box where the code is selecting two values from the list.

$('select.dropdown')
    .dropdown('set selected', ['meteor', 'ember'])
;

<select class="ui fluid dropdown" multiple="multiple" name="skills">
   <option value="">Skills</option>
   <option value="angular">Angular</option>
   <option value="css">CSS</option>
   <option value="ember">Ember</option>
   <option value="html">HTML</option>
   <option value="javascript">Javascript</option>
   <option value="meteor">Meteor</option>
   <option value="node">NodeJS</option>
   </select>

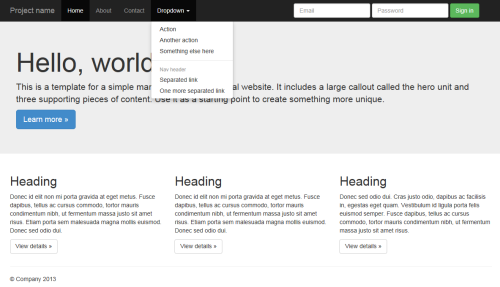
The resulting website looks very similar to one created in Bootstrap, if you use the default theme. One difference you might notice quickly is that the grid system is using 16 as the base, not 12 as Bootstrap does.

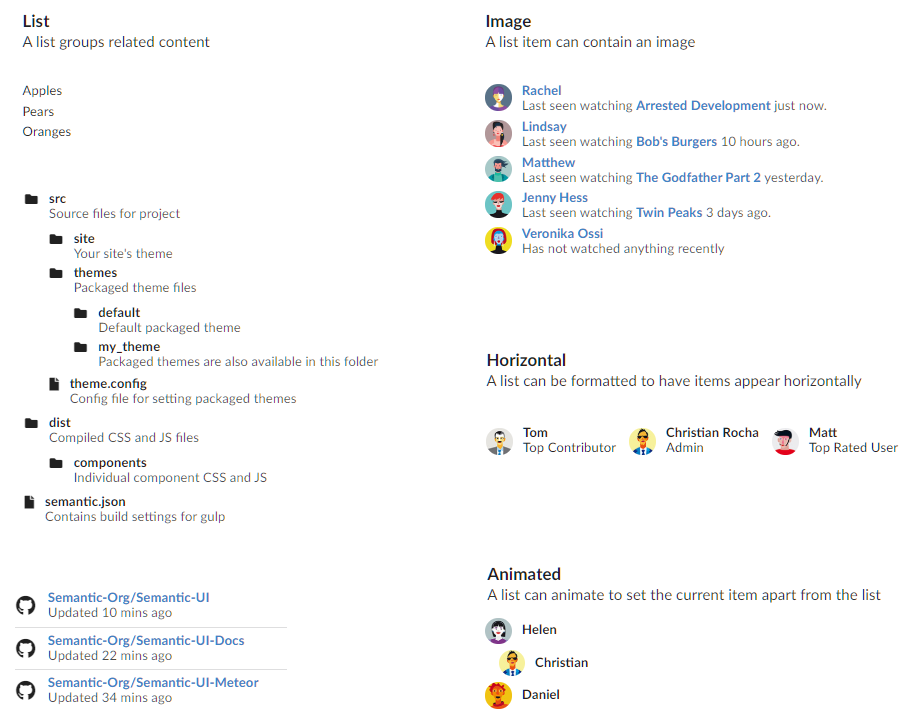
Semantic UI also contains several component you will not find natively in Bootstrap. On of them is dividers, which are available in horizontal and vertical variants.

The list component can very easily be configured in a multitude of different ways.

To create the horizontal list, the markup looks like this:

<div class="ui horizontal list">
  <div class="item">
    <img class="ui avatar image" src="/images/avatar/small/tom.jpg">
    <div class="content">
      <div class="header">Tom</div>
      Top Contributor
    </div>
  </div>
  <div class="item">
    <img class="ui avatar image" src="/images/avatar/small/christian.jpg">
    <div class="content">
      <div class="header">Christian Rocha</div>
      Admin
    </div>
  </div>
  <div class="item">
    <img class="ui avatar image" src="/images/avatar/small/matt.jpg">
    <div class="content">
      <div class="header">Matt</div>
      Top Rated User
    </div>
  </div>
</div>

Take a look at Semantic UI, maybe it will come in handy for your next web project!

1 Comment

Load and Modify External File in NetSuite

When building a suitelet in NetSuite you can either inject HTML, CSS and Javascript in a field, or generate a full HTML page and render it into the suitelet. No matter which method you use, you normally have to write line after line of SuiteScript code where you build the HTML using string concatenation. This is not only difficult and tedious to write, making sure you match all the single and double quotes and semi colons, it also makes the code much harder to maintain.

What if you could just create a regular HTML file, put it in the File Cabinet and then render it into a suitelet? And what if you could use one line of code to inject values from NetSuite in the correct place in the HTML? This could be search results from the use of my search function.

That is what the function looks like:

/**
 * Load file from NetSuite File Cabinet and replace placeholders with actual values
 * 
 * Version    Date            Author           Remarks
 * 1.00       07 Nov 2016     kmartinsson      Created class/function
 * 1.01       08 Nov 2016     kmartinsson      Consolidated setValue and setHTML into
 *                                             one method and added noEscape parameter
 */
// ***** Read and process external file, replacing placeholders with proper values *****
function ExternalFile(filename) {
   //Get the file by path/name, can also be internal id
   var fileId = filename;
   // Load file content and store data
   var file = nlapiLoadFile(fileId);
   var data = file.getValue();
   this.content = data;

   this.setValue = function(placeholder, value, noEscape) {
      // Check if noEscape is passed, if it is and if true then don't escape value.
      // This is needed when value contains HTML code.
      if (typeof noEscape == "undefined") {
         this.content = this.content.replace(new RegExp(placeholder, 'g'), nlapiEscapeXML(value));
      } else {
         if (noEscape == true) {
            this.content = this.content.replace(new RegExp(placeholder, 'g'), value);
         } else {
            this.content = this.content.replace(new RegExp(placeholder, 'g'), nlapiEscapeXML(value));
         }
      }
   }

   this.getContent = function() {
      return this.content;
   }
}

Reference this function in your Suitescript 1.0 code like this:

// Load extrenal HTML file
var html = new ExternalFile("SuiteScripts/BinTransfer.html");
// Insert NetSuite URL for CSS files
var cssFileName = nlapiLoadFile("SuiteScripts/css/drop-shadow.css").getURL();
html.setValue("%cssDropShadow%", cssFileName, true);
cssFileName = nlapiLoadFile("SuiteScripts/css/animate.css").getURL();
html.setValue("%cssAnimate%", cssFileName, true);
// Insert array returned from a search
html.setValue("%binarray%", JSON.stringify(binArray), true);
// Replace placeholders with values
html.setValue("%showAll%", "false");
html.setValue("%company%", companyName);

The last (optional) argument “noEscape” decides if the value should be URL encoded (false/omitted) or not (true) using the function nlapiEscapeXML(). In most cases you don’t need to specify this argument, but if you need to pass HTML or other code into the function you need to set it to true to avoid the code being modified.

As you can see in my example above, I get the NetSuite URL for my CSS files as well. Instead of hard coding the NetSuite URL into the HTML page, I calculate it and insert it when the page is loaded. Not only does it make the page easier to read the code, it also makes it much easier to maintain.

This is a snippet from the HTML file:

<!-- Load plugins/drop-shadow.css from File Cabinet -->
<link href="%cssDropShadow%" rel="stylesheet">
<!-- Load bootstrap-notify.js and animate.css from File Cabinet -->
<script src="%jsBootstrapNotify%"></script>
<link href="%cssAnimate%" rel="stylesheet">

Much easier to read!

Thanks to this little function I have built suitelets who does nothing but load a traditional HTML file with Bootstrap, jQuery, even jQuery Mobile for mobile devices. The page contains Javascript/jQuery that call RESTlest to read and write data. Now I can build suitelets with all the power I have in traditional web development at the same time as I get access to the full NetSuite functionality!

This can also be used to generate XML files to convert into PDF.

Happy coding!


0 Comments

IBM Notes, Domino and the future

As some may already know I was recently laid off after 14 years as a Notes and Domino developer at my workplace. I suspected for a while that some staff reduction would be coming soon, but I was a bit surprised that I was included since I am the only Notes developer in the company.

I had for a while considered to do consulting and freelance development. My wife as well as several friends have been encouraging me for years. So this was just the push I needed.

Demand Better Solutions Logo

I am starting my own company, Demand Better Solutions, where I will focus on Notes and Domino Development, application modernization and migration as well as building brand new web applications and websites.

I realize that me being laid off is just a business decision. It is not personal. Several of the business critical applications at my former employer are developed using IBM Notes, but the executives have for years been talking about moving away from the platform. Of course they don’t realize the huge amount of work needed to do this, but never the less this was/is their ultimate goal.

The reason is that they feel (based on what they hear from other executives) that Notes is old technology. The fact that IBM has been slow in modernizing the interface, and that many of the templates still look like back in 1999 when version 5.0 was released does not help this perception.

Last fall all our email at my old job was moved to Outlook, and ever since I have heard users complaining about missing Notes and certain functionality they were used to. A lot of integration between Notes applications and Notes mail were also lost, and I had to re-create it in different ways. You often hear stories about people complaining about the Notes client, but most of our users wanted nothing but to get it back…

My old employer also uses Visual FoxPro, a product where the last version was released in 2004. It has officially been discontinued by Microsoft, but we use it for several important applications. So I don’t think that even a product being discontinued is driving a huge number of migrations. It is the perception of how modern the product is that matters. And that perception is almost 100% the way the product looks.

To a user the interface is the product.

Create a modern looking application and nobody will question (or care) what tool was used to build it.

The last 3-4 years I have been learning new web technologies, like jQuery, Bootstrap, Ajax, JSON. I have been able to use much of that at work, as well as in several side projects. I also started learning C# and .net. After the layoff I sat down and started looking at (among others) php and mySQL as well as researched frameworks like AngularJS.

As a developer I have to keep up with new technologies, or I will be left behind. But it is hard when you work full-time, have side work and then have a family and house to take care of. Having some free time the last few weeks enabled me to focus on learning some new things.

I don’t think the Notes client will be developed much more, almost everything is moving towards web applications these days anyway. But IBM Domino is something totally different. It is an very capable and powerful development platform. With some skills in web technologies and a good understanding of the Domino platform one can build some amazing applications.

IBM recently released FixPack 7 and announced that the current version of Notes and Domino will be supported for at least five more years, until September 30, 2021. New functionality will be provided through Feature Packs, not version upgrades.

But Domino is just one tool of many. I am looking at LDC Via as another data store, as it very closely resembles Domino with a MongoDB-based NoSQL backend. Salesforce also has many similarities with Domino. The transition would therefore be fairly easy. AngularJS is another popular technology, with version 2.0 soon to be released. And we of course have IBM’s BlueMix offering, where MongoDB is just one of many technologies offered.

As a developer we need to learn new things constantly, the language or tools we use does really not matter. We should pick the proper tool, whatever fits the project.

Do you want to modernize your Notes and Domino applications?
Let me and Demand Better Solutions help you!

2 Comments

MWLUG in Austin – I will be presenting again

I have been selected to present at MWLUG in Austin on August 17-19. My presentation will be kind of part two of my presentation last year in Atlanta. It will focus less on the basics and go more into the fun and more advanced stuff. Kind of an extended version of my Connect 2016 presentation.

The title is “Think Outside The Box – Part 2”, and I will discuss and show how you can build a modern web front-end using standard techniques like Javascript/jQuery and frameworks like Bootstrap and jQuery Mobile and have it work against a Domino backend. I will demonstrate how to easily read data from and write data to the Domino database, and how to consume data using free plugins like BootstrapTable and FullCalendar.

I will also discuss the difference between JSON and JSONP and why the latter usually is better when building this type of integration. You will leave with a sample database containing the source code all the demos I will be showing as well as Lotusscript script libraries with classes I built to easily build agents that will interact with the website.

The idea is that you should be able to attend my session in Austin even if you haven’t seen any previous presentation. I will assume you have basic web design skills (HTML, CSS and a working understanding of Javascript) but you don’t have to be an expert at all. I also recommend some Lotusscript knowledge, as I will be providing all attendees with plenty of code to bring home and start using yourself.

I hope to see you in Austin in August! If you haven’t registered yet, go ahead and do it now! There are still seats left.

0 Comments

My Connect 2016 presentation & demo database

Connect2016_DemoDesignAs I promised, I would post my IBM Connect 2016 presentation on my blog.

Presentation (PDF): {link} 

Demo database (ZIP): {link}

You can also find the presentation on SlideShare.net.

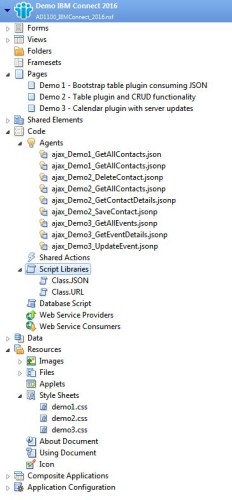
To the right you see the database design, you want to look in the Agent section for the agents and in the Pages section for the HTML pages.

Note: You need to sign the database with an ID that have the proper rights. Otherwise the code will not work.

Enjoy!


6 Comments

Microsoft releases Visual Studio 2015

Microsoft today released the latest version of their development environment Visual Studio. There are even free versions, including the complete IDE Visual Studio Community and the code editor Visual Studio Code (available for Widnows, Linux and OSX).

Visual Studio now includes even more tools for cross platform mobile development for iOS  and Android. There is even an Android emulator included. The web development part supports tools and frameworks like Angular, Bootstrap, jQuery, Backbone and Django.

And naturally the IDE also supports Windows, including Windows 10 (expected to be released at the end of the month).

I have been using tools in the Visual Studio family for many years, I started with a beta of Visual Basic 1.0 a long time ago, and used all version up to and including VB 6.0. I also played around some with Visual C++ and even Visual J++. After that I focused mainly on Lotus Notes development, but recently I have started some C#/.NET projects at work using Visual Studio Community 2013.

0 Comments

MWLUG in Atlanta – I will be presenting!

It is less than 7 weeks left until MWLUG, the Midwest Lotus User Group conference. This year the conference takes place in Atlanta, between August 19 and 21. During the three days there will be over 40 technical session and workshops on collaboration, receptions and networking opportunities, as well as access to experts of IBM solutions, both from IBM and other companies. The topics includes application development, system administration, best practices, customer buisness cases and innovation/future plans by IBM. Breakfast and lunch is included for two days as well. And all this for the cost of only $50 per person! The event takes place at Ritz-Carlton in downtown Atlanta. There is a block of rooms reserved at a special conference rate of $149.00 per night.

One of the sessions will also mark my personal debute as a speaker at a conference. I will present “Break out of the box – Integrate existing Domino data with modern websites” where I will talk about how to integrate websites built either within Domino or on other platforms with backend data that resides in a Domino database. I will talk about how you can build a modern looking website using tools like jQuery and Bootstrap and seamlessly integrate them with existing data on your trusty Domino server using JSON and Ajax. I will also provide plenty of example code ready for you to bring home and start playing with.

A number of IBM Champions will be presenting, as well as IBMers and other industry experts. So no matter your interest, I am sure you will find plenty of good sessions. I am sure I will have a hard time picking which sessions to attend!

So what are you waiting for? Go to http://www.mwlug.com and register! See you there!


1 Comment

Bug in Bootstrap grids

While working on a web form using Bootstrap, I ran into a very strange issue with the grid system. I am not sure if I should qualify it as a bug, but it is definitely very annoying, and not the expected behavior.

I created a page containing code like this:

<div class="container">
  <div class="col-sm-4 form-group">
    <label for="ContactName">Name</label>
    <input type="text" class="form-control" id="ContactName" placeholder="FirstName LastName">
  </div>
  <div class="col-sm-4 form-group">
    <label for="ContactEmail">Contact Email</label>
    <input type="email" class="form-control" id="ContactEmail" placeholder="username@example.com">
  </div>
  <div class="col-sm-4 form-group">
    <label for="ContactPhone">Contact Phone</label>
    <input type="phone" class="form-control" id="ContactPhone" placeholder="(xxx) xxx-xxxx">
  </div>
</div>

What happened was that when the browser window was smaller than the breakpoint for col-sm (less than 992 pixel wide), the input fields became semi-disabled. I could not click on them to select them and enter values, and the cursor did not change into an insert-point like it should. For all purposes it looked like the field had been disabled. But using the tab key, it was possible to go to the field and enter values. When I made the browser wider, it suddenly worked again. The issue occured in IE and Firefox, both the latest versions.

The solution was to put the columns into a div with the row class. Suddenly it all worked:

<div class="container">
  <div class="row">
    <div class="col-sm-4 form-group">
      <label for="ContactName">Name</label>
      <input type="text" class="form-control" id="ContactName" placeholder="FirstName LastName">
    </div>
    <div class="col-sm-4 form-group">
      <label for="ContactEmail">Contact Email</label>
      <input type="email" class="form-control" id="ContactEmail" placeholder="username@example.com">
    </div>
    <div class="col-sm-4 form-group">
      <label for="ContactPhone">Contact Phone</label>
      <input type="phone" class="form-control" id="ContactPhone" placeholder="(xxx) xxx-xxxx">
    </div>
  </div>
</div>

Hope this will help someone!

2 Comments

File Upload in Classic Domino Web using jQuery and Bootstrap

This week I was asked to create a simple web form where customers could fill out a few fields, attach two files and submit it for review. The document with the information and attachments are saved into a Domino database, so it can be processed thought the Notes client by the internal staff.

These days I mainly use Bootstrap (and jQuery) to design the webpages, since Bootstrap makes it very quick and easy to get a nice clean look of the page. Using jQuery allows me to do some nice manipulations of the DOM, hiding and showing sections as needed for example, or disable the submit button until all required fields have been filled out.

It has been a long time since I worked with the file upload control in Domino, and it was as ugly as I remembered it. But I knew I had seen some nice jQuery/Bootstrap file upload controls, so I located one that I liked in the Jasny plugin library. If you haven’t already, take a look at those components!

So how do I tie this control to the Domino file upload control? As so many times before, Jake Howlett and his excellent site CodeStore comes to the rescue. He wrote an article back in 2005 about how to fake a file upload control, and that code can be used as-is, and combined with the Jasny plugin.

Here is what my code looks like after doing that:

<div class="col-md-6">
  <label>Producer Agreement</label>
  <!-- File Upload -->
  <div class="fileinput fileinput-new input-group" data-provides="fileinput" title="Attach file here">
    <div class="form-control" data-trigger="fileinput">
      <i class="glyphicon glyphicon-file fileinput-exists"></i>&nbsp;
      <span class="fileinput-filename"></span>
    </div>
    <span class="input-group-addon btn btn-default btn-file">
      <span class="fileinput-new">Select file</span>
      <span class="fileinput-exists">Change</span>
      <input type="file" name="%%File.1" class="required">
    </span>
    <a href="#" class="input-group-addon btn btn-default fileinput-exists" data-dismiss="fileinput">Remove</a>
  </div>
</div>

On the second file upload control I just change the name to “%%File.2”. The form tag must have the encoding set to multipart/form-data, so this is what it looks like for me:

<form name="SubmissionForm" id="SubmissionForm" 
action="AgencySubmission?CreateDocument" method="post" 
enctype="multipart/form-data">

It all worked perfectly. I was able to attach the files and submit the form, and the files showed up in the Notes client. What I did not like was the dreaded “Form processed” message. I tried a few different things, using the $$Return field, etc. But nothing worked.

To make a long story short(er), and without diving too deep into details, I had the form setup to render as HTML, not as a Notes form, thus using ?ReadForm to display it. But when I changed it to Notes on the form properties, the Domino server added it’s own Javascript code to submit the form (in addition to extra HTML). I found out a way to trick Domino to “hide” that Javascript code, so only my jQuery/Javascript code was sent to the browser.

Then I wrote my own code to do a HTTP POST submission of the form as multipart/form-data:

$('form#SubmissionForm').submit(function(event){
  // Disable the default form submission
  event.preventDefault();
  // Gat all form data  
  var formData = new FormData($(this)[0]);
  $('input').each( function() {
    formData.append($(this).attr('id'),$(this).val());
  });
  // Submit form to Domino server using specified form
  $.ajax({
    url: 'AgencySubmission?CreateDocument',
    type: 'POST',
    data: formData,
    async: false,
    cache: false,
    contentType: false,   // Important!
    processData: false,   // Important!
    success: function (returndata) {
      window.location = 'SubmissionThankYou.html';
    }
  });
  return false;
});

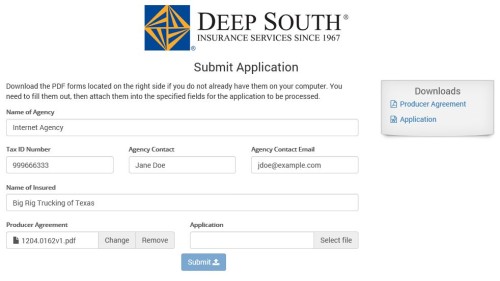
That’s it! It worked like a charm. And this is what the final result looks like:

FileUploadControl_Bootstrap

Of course, if you are able to use XPages, there are nice file upload controls there that you can use.

6 Comments

Free Software – Password Reset for Notes/Domino

Earlier this year I was asked to research some alternatives for a web-based password reset function at my work. One of the larger support burdens are users who forget the passwords, especially in the first few days after changing it. We have a 90 day password lifespan, then a new password need to be picked. Some users wait until the last minute, which usually is Friday afternoon right before they go home, making it very likely that they will forget the new password over the weekend. Another big group is auditors, who may come in every 6 months or so, and by then their passwords have of course already expired.

I first looked at some COTS solutions from HADSL (FirM) and BCC (AdminSuite). They were both very competent, and in addition have several other functions that I really would like to have in my environment (like synchronization between Domino Directory and Active Directory). However, as my company is in a cost saving phase, I was asked if I could build something myself, so I played around a little, and came up with a small and simple application.

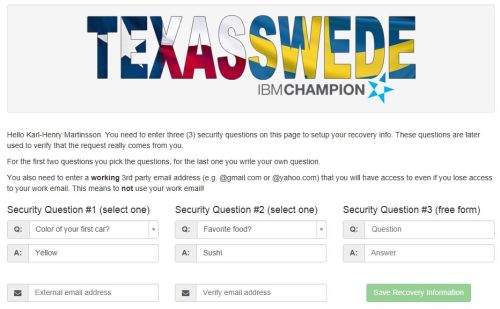
The application contains two web pages. The first page (Setup) is where the user will setup the security questions used for password recovery as well as entering an external email address that they have access to even if locked out from the Domino account at work. This page is protected by regular Notes security, so the users need to set this up before they lose access to their account.

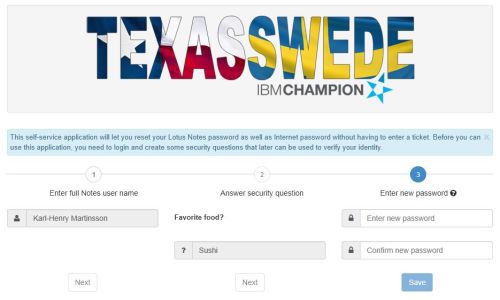
The second page (Request)is where the user can request the password to be reset. After entering their Notes name, the user is presented with one of the security questions. If the question as answered correctly, the user can now enter a new password. If the question is wrong, another of the questions is presented to the user. I am also using regexp to make sure that the password match the requirement our organisation have for password strength.

Both pages are built using Bootstrap (v3.2.0),  jQuery (v1.11.0), and for the icons I use Font Awesome (v4.2.0), all loaded from BootstrapCDN. I also use a few local CSS and Javascript files to handle older versions of Internet Explorer. The process steps were created using code by jamro and you can find the code here. By the way, Bootsnipp is a great resource to avoid having to invent the wheel again. There are hundreds of free snippets of code there to build neat Bootstrap functionality.

When the user fill out and submit the setup page, a document is created in a Notes database. When the user need to reset the password, the security questions and answers are retrieved from that document. To prevent unauthorised access to the Notes documents, they use Readers fields to prevent them from being visible to anyone but the signer of the agents running on the server.

This application can of course be updated with more functionality. Instead of allowing the user to pick a password, one could be generated by the server and sent through email to the address entered during setup. There are probably other things that can be done to adapt this application to the needs of your organization. And you probably want to change the logo on the pages to fit your organisation.

You can download the application here. It is licensed under Apache 2.0. I will try to get it up on OpenNTF.org soon as well.

Read the “About” page for instructions on installation and setup, as well as full license and attribution. Enjoy!

7 Comments

Excellent Bootstrap select plugin with great support

For a Domino-based web application I am currently working on, I needed a nicer looking select box (drop down) than what Bootstrap offers out of the box. I did some searches and found a handful of free ones, most of them pretty good but not exactly what I wanted. Some did not handle different themes, other had additional functionality I did not want/need, etc. I probably been looking for a good alternative for 3 weeks by now.

Then the other day I found an inexpensive plugin at CodeCanyon. Custom Select for Twitter Bootstrap 3 is just $5 if you use it for a public site, or $25 if you use it on a site where you charge the users for access. It’s well worth it. The control is nice and clean, and very easy to use.

Custom Select for Twitter Bootstrap 3

What really impressed me was how the author of the plugin, Lisa Stoz, fixed an issue I ran into. It was not a bug in the plugin, but I had a need to use custom tag attributes, and the plugin did not support that originally. The next day Lisa had a new version available with that functionality added. She also helped me with some additional questions that I had. I am very impressed with the quick response and the professional support.

I am new to CodeCanyon, but that site seems very nice. It contains a large number of jQuery and javascript plugins, Bootstrap themes and plugins, and much more. There is also a section with WordPress plugins, as well as a separate site for WordPress themes called ThemeForrest. That site also have other themes and templates. If you build websites, but like me is not a graphics genius, ThemeForrest is a great place to find themes or just inspiration for your site. The themes (as are the plugins) are very modestly priced, between $5 and $10 in most cases.

I have just started to scratch the surface of what’s available there, but I already think this is a great resource. The next time I need a plugin for Bootstrap, jQuery or WordPress, I will probably start at CodeCanyon.

Disclaimer: The links above uses an affiliate code, giving me a small credit at the site if you purchase anything.

1 Comment

Bootstrap – An Overview

As I mentioned in a previous article, my boss asked me to write some short summaries of a couple of common web technologies and frameworks. I already wrote about jQuery, and now the turn has come to Twitter Bootstrap, commonly called just Bootstrap.

Twitter Bootstrap is one of the durrent darlings of web developers. It is a CSS framework, and it also includes some Javascript and the icon set GlyphIcons. Personally I use Font Awesome, a larger set (currently 361 icons) of icons compatible with GlyphIcons.

Just like jQuery, you can use Bootstrap from a CDN (Content Delivery Network). There are also several themes available (both free and premium), so you can quickly get a different look than with the default Bootstrap colors. The free themes are also available through a CDN.

With Bootstrap it is very easy to quickly create nice looking websites/applications. There are several ready-made templates on the Bootstrap site, and there are many more available all over the internet.

So what you typically do is to download a template that fit your project, and then start customizing it. A couple of weeks ago I needed to quickly put up a one-page marketing website. I simply downloaded one of the templates, changed the headline, added my content and removed the sign-up button. In 30 minutes I had the site up, and that included writing the inital text. Then I spent another hour or so tweaking and editing the text, but the actual design part took just minutes.

I am also currently working on a larger web application (which I hope to be able to blog about later this fall), and I choose to use Bootstrap there as well. One of the issues I always had in the past was to find a nice menu system to use on my sites, and this actually caused me to abandon the redesign of my personal website for over a year. When I discovered Bootstrap it just took me a few hours to totally revamp my website (including adding some functionality), and I now have a nice and functional menu system. The site also include icons for the menu entries, using Font Awesome.

Bootstrap contains a large number of elements: buttons, dropdowns, tables, labels, input controls, alert messages, a grid system (totally redesigned in Bootstrap version 3), etc. There is plenty of documentation available online, both at the official Bootstrap website and on other sites and forums.

Bootstrap Documentation

So if you haven’t looked at Bootstrap yet, see if it might help you in your next web project!

1 Comment

Bootstrap 3 released

Back in June I wrote about the availability of Release Candidate 1 of Bootstrap 3. Today the finalized version have been released.

A sample site created with Bootstrap 3


If you are migrating from version 2 to version 3, here is a list of what changed.

Among the many changes is a modified grid system, using percent instead of pixel-based width, responsiveness built in to the code files, a new flatter/cleaner look, and a number of new elements. You can read more in Kathy Brown’s article at SocialBizUG.org.

You can read more at http://getbootstrap.com/, where you also can download it. If you prefer to use a CDN (Content Delivery Network), you can use BootstrapCDN at http://www.bootstrapcdn.com/

Also, if you are developing using XPages, don’t miss Philippe Riand’s latest amazing project, Bootstrap for XPages. It uses Bootstrap 2.3, as version 3.0 probably will not work correctly in XPiNC (XPage in Notes Client), due to the fact that support for IE 7 and Firefox 3.5 have been dropped in the latest version.

0 Comments

Bootstrap 3 Release Candidate 1 available

As of this last weekend, Release Candidate 1 (RC1) of the next major version of Bootstrap became available. You can also use the hosted version at BootstrapCDN.

There are many changes in this version, and among them I want to point out a few that I consider important:

  • No more support for old browsers like Internet Explorer 7 and earlier or Firefox 3.6 and earlier. This avoids many hacks, and makes the code faster.
  • Mobile first- Responsive CSS is no longer in a separate file, but included in the core CSS file.
  • Overhauled and simplified grid system, including more friendly to mobile devices where they scale up and down better. Grid system is using percentage instead of pixel, which helps in mobile websites.
  • Buttons – “fewer but better”, per the documentation. Buttons look simpler/flattened.
  • Moving Glyphicons to a separate repository, instead of integrating with Bootstrap. This should make it easier to use Font Awesome as replacement.
  • “Hero unit” renamed “jumbotron”.
  • Added new components: Panel, List group
  • Submenus have been dropped.
  • And many more changes…

There is no official release date yet, but I think we can expect the final version in a month or two.

2 Comments

jQuery – An Overview

Yesterday my boss asked me about a simple overview/tutorial explaining jQuery, Bootstrap and some other web technologies, and how they work together. I decided to also post the result on my blog, so here is the first part. You may recognize some code from a previous blog entry.

jQuery is a currently very popular Javascript framework/library. There are other ones, like Dojo (used by IBM in XPages) and YUI (originally developed by Yahoo), but jQuery is right now at the top when it comes to usage.
jQuery contains the plumbing behind the scene, it contains functions to let the different elements on the page talk to each other and interact, for example trigger events on click or change. It also have functions to hide and show elements (either directly or fade in or out).

One of the big benefits with jQuery is that many functions are much easier to do than in traditional Javascript. It also addresses browser inconsistency, so you don’t have to write different code for Firefox and Internet Explorer. jQuery is Javascript, just packaged in a nice library and simplified. There are also UI components and mobile components, found in jQuery UI and jQuery Mobile. Here are a couple of examples, comparing plain Javascript with jQuery: http://blog.jbstrickler.com/2010/06/vanilla-javascript-vs-jquery/.

jQuery ties into the DOM (Document Object model) of the browser/webpage in a very easy-to-use way. The way elements are addressed is identical to how you do it in CSS, using . (dot) for classes and # for individual elements.

It is not hard to start with jQuery. You do not even have to host the library on your own server, several companies (including Microsoft and Google) host jQuery (as well as other libraries and frameworks) in what is called a CDN (Content Delivery Network). You simply include a line of code in the head section of your HTML, telling the browser to load jQuery from a specified location, and you are all set:

<head>
    <title>Hello, jQuery</title>
    <script src="//ajax.googleapis.com/ajax/libs/jquery/1.8.1/jquery.min.js"></script>
</head>

Notice that you don’t use http: or https: at the start of the URL. This is a trick that makes it work both on a http or a https site. However, if you have the code locally in the file system on your computer (like many do before uploading the html file to a server), you must add http: at the beginning for it to load.

Let take a look at our first jQuery example. Below we have a very simple piece of HTML code:

<body>
    <button id="btnSave">Save</button>
    <div id="messageBox"></div>
</body>

What we want to do is that when the button is clicked, a message should be displayed in the div with ID messageBox. That is done with the following piece of jQuery:

$("#btnSave").click( function() { 
    $("#messageBox").html("You clicked the Save button."); 
});

What this do is to replace everything inside the div with the text/HTML code we specify. The second line is the code to execute when the event specified triggers/fires. You can put triggers on almost any element, and depending on the element type, you have different triggers.

The code between the first and last curly brackets { } is being executed when the event is triggered. As you can see, I have the code I showed earlier nested inside this code. What all this does is to wait until the page is loaded, then start creating event triggers.

There are two schools when it comes to where you put the jQuery code. Soem developers prefer to put the code inside <script> tags at the end of the page, after all HTML code and right before </body>. That is is so that the code is not executed until the page (and all the elements on it) have been loaded.

There is another way to do it, as well. This one allows you to put the code in the <script> section of the header section, but it us using jQuery to not load any code until the page has finished loading:

$(document).ready(function () {
    // Setup the element with id "btnSave" to react on click
    $("#btnSave").click( function() {
        // When clicked, set the innerHTML of the element with
        // id "messageBox" to the specified html string.
        $("#messageBox").html("You clicked the Save button.");
    });
});

The important thing is that you can not start put events on elements until they have been created on the page, or nothing will work.

One of the really cool features with jQuery is how easy it is to call another page/url and get something back. This is commonly called Ajax (Asynchronous Javascript and XML), even if it these days more often than not involves getting JSON back instead of XML.
JSON stands for Javascript Object Notation and is a way to package data in the same way you would do if you created a Javascript object. A simple example would look like this:

{
    "FirstName":"Karl-Henry",
    "LastName":"Martinsson",
    "Department:"IT"
}

I can now assign the object to a variable (let’s call it employee) and I can then access the values using regular Javascript:

alert(employee.FirstName + " " + employee.LastName + " works in " + employee.Department);

This ease of parsing makes JSON ideal to use to retrieve values from a data source and display them on a webpage, using Javascript.

Let’s look at a more complicated example. I will call a URL on a server, which will trigger an agent to run to retrieve data from a database and return it in HTML format. This particular URL points to a Domino agent written in Lotusscript, but it could be written in any language supported by the server, like php. For a Domino server, you could also use an XPages agent.

Here is the Javascript code to call a URL and put the content returned into a element on the web page:

function loadProgressNotes(clientunid) {
    $.ajax({
        url: "/mydatabase.nsf/GetProgressNotes?OpenAgent",
        data: {"ClientUNID":clientunid,"Start":"1","Count":"10"},
        cache: false
    }).done(function(returndata) {
        $("#progressNotes").html(returndata);
    });
}

I broke this code out as a separate function, as I need/want to call it in several places. The function just contains one single jQuery function call, .ajax(). I pass a Javascript object to the function, containing the data needed by the function. Many jQuery functions works like this, you pass a Javascript object with arguments instead of passing a large number of individual arguments. You can do the same in Lotusscript, by passing an object or a custom data type to a function instead of numerous arguments.

In this particular case, I am calling .ajax() with 3 arguments. The first one is the URL to go to, the second one is the data to send to that URL, and the last one is a flag telling jQuery to add a cache buster to the end of the URL it constructs. If I would not add that, and I had recently made the same call, I would get old data, as web servers and browsers cache data for performance reasons.
The interesting thing in the code above is perhaps that the data I pass to the URL are itself a Javascript object, so we have a Javascript object where one of the elements is another object.

So what happens is that jQuery performs a call to www.domain.com/mydatabase.nsf/GetProgressNotes?OpenAgent&ClientUNID=something&Start=1&Count=10&_15614312653

The last number is the cache buster, simply a timestamp (milliseconds since midnight, Jan 1, 1970).
The program/agent on the server reads the arguments, performs whatever database lookup it needs, and generates HTML based on that. This HTML is returned by the .ajax() call in data above. The jQuery call is sitting in the background and waiting for the agent to return the data. When this is done, the .done() event is triggered.
In that event, I have written some jQuery code to update the contents of the element called “progressNotes” with whatever the AJAX call returns, in this case some HTML.

It may be more common to have the agent return JSON and parse it, putting different values into different elements on the page. Here is an example, where I go through all the input fields and text area fields on a HTML form and collect the field values/contents for any of the fields having the custom attribute called notesfield. The value of the attribute is the field name in the Domino database, making it very easy to send the data to the correct place on the server.  A typical input field could look like this:

<input notesfield="FirstName" type="text" value="" placeholder="First Name">

Below is the Javascript code, using jQuery to update the record in the Domino database and return JSON that will indicate success or failure, as well as a custom message that will either explain the reason for failure or a message that the document was updated.

var json = new Object();

myjson["ClientUNID"] = "E7A2D820EE10123C86257BAD0056A5F4";

$('input[notesfield]').each(function() {
    fieldname = $(this).attr("notesfield");
    fieldvalue = $(this).val();
    myjson[fieldname] = fieldvalue;
});

$('textarea[notesfield]').each(function() {
    fieldname = $(this).attr("notesfield");
    fieldvalue = $(this).val();
    myjson[fieldname] = fieldvalue;
});

$.ajax({
    url: "/mydatabase.nsf/UpdateClient?OpenAgent", 
    data: myjson,
    cache: false
}).done(function(returndata) {
    if (returndata.status=="Error") {
        $(".errorMessageClient").html("Error! " + returndata.msg).show();
    } else if (returndata.status=="Success") {
        $(".successMessageClient").html("Success! " + returndata.msg).show();
    });
});

As you can see, it is easy to retrieve values from the JSON you get back.

That’s all for now. Next time I will talk about Bootstrap.

1 Comment

Free Bootstrap tools

I started using Bootstrap a while back, and really enjoy the fact that I quickly can build a website/application using the framework. But there is always room for improvement. I found some useful tools that will help you, if you are using Bootstrap, to build your pages even quicker.

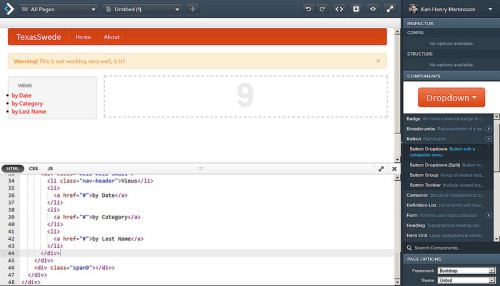
The first resource is Divshot, a online tool/interface builder where you can design your pages, then get the HTML code and insert it into your page. I just started using it this weekend, but it is a brilliant tool, easy to use and very helpful. It’s currently in free beta, you just need to register.

DivShot editor
DivShot editor

Update: DivShot is now a commercial product, but you can use it for free if you just have one single project.

Bootbox.js is a Javascript library that help you create programatic dialog boxes.

prettyCheckable replaces the standard checkboxes with nicer looking ones.

Datepicker for Bootstrap is (as the name indicates) a datepicker, made to match the Bootstrap look.

jQuery Form Validation is using the Bootstrap stylesshet to make it match the rest of the framework. I haven’t tried this one yet, but it looks very useful.

Fuel UX is another way to extend Bootstrap with additional controls. Very nice looking!

Lavish is a cool online tool that takes an image and creates a color scheme based on it for use in Bootstrap.


You can find these tools and more here.

0 Comments

How to set doctype on Notes forms

When redesigning my website to use Bootstrap, I ran into a problem. The navbar (meny) did not render correctly in Internet Explorer 9, despite looking perfect in Firefox and Internet Explorer 10. There are several discussions about this problem on StackOverflow and other forums, and the solution is simply to add <!DOCTYPE HTML> on the first line of the HTML code.

However, IBM Domino automatically adds a different doctype string, and there is no database or form property to change/set the correct value. But there is actually a way, and it is not very complicated.

Simply create a computed for display field called $$HTMLFrontMatter. Make it hidden from web browsers, and in it you enter a formula that will give you the desired doctype. I simply put “<!DOCTYPE HTML>” in there, and it worked perfectly. Also make sure “Use Javascript when generating pages” is turned off.

This way to modify the HTML generated is documented in the online help. It was added in Domino 8.

2 Comments

Show and Tell – Dynamic Web Calendar

In this post in the developerWorks forum, Andy Herlihy is asking about how to create a small calendar that can be embedded into an existing intranet website. As Carl Tyler points out, Andy could simply use Dojo.

However, this is a good example to show some jQuery combined with the power of IBM Lotus Domino.  Lets’ break it down into a few smaller steps.

The first one is to create a Domino web agent that will take the current date and build a calendar for that month. There will be no links or javascript code in the HTML generated, just plain HTML code, with some id attributes to make it easy to address different cells later.

The next step is to create a very simple webpage, with some Javascript to load jQuery and set up the calendar to detect clicks. The clicks will cause another call to the Domino server, this time to a view using RestrictToCategories to only get the entries for the specified date. The entries are returned as HTML and through jQuery they are displayed in a div on the webpage. We also want to add a little bit of CSS to make the calendar pretty. The CSS also lives on the HTML page.

Finally we create the view, it’s associated view template form and a form to create some entries that we can use for testing.


Let’s look at the code. First the Domino web agent. It should be pretty self explanatory:

%REM
    Agent WebCalendar
    Created Nov 26, 2012 by Karl-Henry Martinsson/Deep-South
    Description: Returns HTML for a calendar for current month
%END REM
Option Public
Option Declare

Sub Initialize
    '*** Used to get URL params
    Dim session As New NotesSession
    Dim webform As NotesDocument
    Dim urlstring As String
    Dim urlarr As Variant
    Dim urlvaluename As Variant
    Dim urldata List As String
    Dim webservername As String
    '*** Agent specific
    Dim startDate As NotesDateTime
    Dim endDate As NotesDateTime
    Dim i As Integer
    Dim j As Integer
    Dim startweekday As Integer
    Dim thisMonth As Integer
    Dim currDate As Double
    Dim cellclass As String

    Set webform = session.DocumentContext
    '*** Calculate path for this database, for image/icon file references later
    webservername = webform.GetItemValue("Server_Name")(0)
    '*** Remove leading "OpenAgent"
    urlstring = StrRight(webform.Query_String_Decoded(0),"&")

    If urlstring <> "" Then
        '*** Get all params passed to agent
        urlarr = Split(urlstring,"&")
        For i = LBound(urlarr) To UBound(urlarr)
            urlvaluename = Split(urlarr(i),"=")
            urldata(urlvaluename(0)) = urlvaluename(1)
        Next

        If IsElement(urldata("date")) = False Then
            urldata("date") = Format$(Now(),"mm/dd/yyyy")
        End If
    Else
        urldata("date") = Format$(Now(),"mm/dd/yyyy")
    End If

    '*** Get first and last date of current month
    Set startDate = New NotesDateTime(Format$(urldata("date"),"mm/01/yyyy"))
    Set endDate = New NotesDateTime(startdate.DateOnly)
    Call endDate.AdjustMonth(1)
    Call endDate.AdjustDay(-1)

    currDate = CDbl(CDat(startDate.DateOnly))
    startweekday = Weekday(Cdat(startDate.Dateonly))

    '*** HTML header
    Print "Content-type: text/html" ' & CRLF
    Print |<table class="calendar">|
    '*** Create calendar header with weekdays
    Print |<tr><td colspan=7 class="labelMonthYear">| + Format$(CDat(startDate.DateOnly),"mmmm yyyy") + |</td></tr>|
    Print |<tr class="calendarHeader">|
    Print |<td>S</td><td>M</td><td>T</td><td>W</td><td>T</td><td>F</td><td>S</td>|
    Print |</tr>|

    '*** Build rows for the weeks
    For i = 1 To 6
        Print |<!-- Start row | & i & | -->|
        Print |<tr class="calendarRow" id="calendarRow| & i & |">|
        For j = 1 To 7
            If j < startweekday And i = 1 Then
                Print |<td class="emptyCell"></td>|            ' Blank cell before dates
            ElseIf currDate >= CDbl(CDat(startDate.DateOnly)) And currDate <= CDbl(CDat(endDate.DateOnly)) Then
                cellclass = "calendarCell"
                If j = 1 Then
                    cellclass = cellclass + " sundayCell"
                End If
                If j = 7 Then
                    cellclass = cellclass + " saturdayCell"
                End If
                Print |<td class="| + cellclass + |" id="| + Format$(CDat(currDate),"yyyy-mm-dd") + |">|
                Print Day(CDat(currDate))    ' Day number
                Print |</td>|
                currDate = currDate + 1
            Else
                Print |<td class="emptyCell"></td>|            ' Blank cell after dates
            End If
        Next
        Print |</tr>|
        Print |<!-- End row | & i & | -->|
        Print ""
        If currDate >= CDbl(CDat(endDate.DateOnly)) Then
            Exit For
        End If
    Next
    Print |</table>|
End Sub

I am setting the id attribute on the cells to the date in yyyy-mm-dd format, and I will also use that in the categorized view that will later use. Using ISO 8601 for dates have several advantages, in our case particular because we don’t have to worry about the / character that will mess up the URL to the Domino view we will call later.
I also use class attributes on the cells, so CSS can be used to easily format the calendar.
Next we create the web page where we will insert the calendar and also display the entries for any selected day. We load jQuery from Googles CDN, and after the DOM is fully loaded by the browser, we make an ajax call to the Domino server and get the HTML of the calendar back.

After the calendar is retrieved, we use jQuery to trigger a Javascript function on click on any date cell. The code will detect the id of the cell, which just happens to be the date, and then performs another ajax call to teh Domino server, this time to the view to return all entries for the selected date. The data returned is then inserted into a div.

<!doctype html> 
<html>
  <head>
    <meta http-equiv="Content-Type" content="text/html; charset=UTF-8" />
    <title>Calendar Test</title>
    <script src="http://ajax.googleapis.com/ajax/libs/jquery/1.8.1/jquery.min.js"></script>
</head>
<script>
    // The following function is executed after page is fully loaded
    $(document).ready(function () {
        var remoteURL = "http://www.texasswede.com/test/calendar.nsf/WebCalendar?OpenAgent";
        var viewURL = "http://www.texasswede.com/test/calendar.nsf/CalendarView?OpenView";
        // Load the calendar HTML from our Domino server using ajax
        $.get(remoteURL,
        function(data) {
                // Update div with id 'ajaxCalendar' with HTML calendar from server
                $("#ajaxCalendar").html(data);
                // Set all calendar cells to trigger on click
                $(".calendarCell").each( function(i) { 
                        // Get the id (i.e. selected day) of the cell clicked
                        var id = $(this).attr("id");               
                        $(this).click( function() {
                        // Call view on Domino server and return entries for selected day
                        $.get(viewURL, { RestrictToCategory: id },
                                function(data) {
                                        // Put list of entries in viewData div
                                        $("#viewData").html(data);
                                 });
                        });
                } );
        });
});
</script>
<style>
    td.calendarCell {
        border: 1px dotted black;
        height: 30px;
        width: 30px;
        text-align: center;
        vertical-align: middle;
    }
    td.emptyCell {
        background-color: #EFEFEF;
        height: 30px;
        width: 30px;
    }
    td.sundayCell {
        background-color: #DDDDDD;
        color: #DD0000;
    }
    td.saturdayCell {
        background-color: #DDDDDD;
    }
    .labelMonthYear {
        font-family: Arial;
        font-size: 12pt;
        text-align: center;
    }
  </style>
  <body>
    <div id="ajaxCalendar"></div>
    <br>
    <div id="viewData"></div>
  </body>
</html>

What’s left to do to get this all to work is to create the following Domino design elements:

  1. A form to use for entering calendar data. I called it “Calendar Entry”, and just put two fields on it, ‘CreatedDate’ (computed for display, using @Now) and ‘Title’ (text field).
  2. A view called ‘CalendarView’, with two columns. The first one is categorized and is displaying the created date in yyyy-mm-dd format, while the second one is displaying the title field and adding an HTML line break after. The view is set to treat content as HTML.
  3. A form called ‘$$ViewTemplate for CalendarView’, set to treat form as HTML. The form only contains an embedded view element, pointing to ‘CalendarView’, and it is set to return data as HTML as well.

This is the formula I used in the first column of the ‘CalendarView’ view:

y:= @Year(CreatedDate);
m:= @Month(CreatedDate);
d:= @Day(CreatedDate);
yyyy:=@Text(y);
mm:=@If(m<10;"0";"") + @Text(m);
dd:=@If(d<10;"0";"") + @Text(d);
yyyy + "-" + mm + "-" + dd

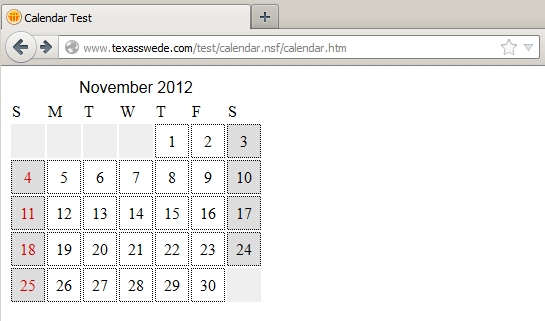
And this is what it looks like when finished:

This is just one example of how you can combine Domino (agents, views and forms) with jQuery in order to integrate Domino based data into your web applications.

Happy coding!

1 Comment

Using jQuery to emulate Notes hide-when

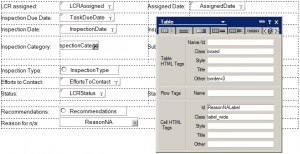
We have all built applications in Lotus Notes where we use the value of a checkbox, radio button or dropdown box to show or hide additional fields, like you can see in this clip.

But the hide-when formula will not work this way on the web. The Domino HTTP stack will simply render the page before sending it to the browser, and even if you make a selection in the browser, the hidden section will not display or vice versa.
So what can you do? One easy way is to use jQuery (or Dojo, if you rather fancy that). You can then detect if a checkbox/radio button is clicked on or if a dropdown box is changed. Then you read the value of the button/box and hide/show the content you like.


In this example, you can also see that that one of the dropdown boxes actually switch which dropdown box to display next to it, you can see that the available choices are different, in addition to performing the more visible hiding of the last row when recommendations is not set to “n/a”.
So how do you actually do this? It is fairly easy.
First you add a reference to the jQuery library to the HTML Head Content section of the form. Remember that you need to prefix any quote marks with a \ when you put it in as a string. Here I am calling the Google-hosted jQuery library:
<script src="http://ajax.googleapis.com/ajax/libs/jquery/1.8.1/jquery.min.js"></script>
Next, remove any hide-when formulas from the form you are going to expose on the web. That is important, since the Domino server will otherwise not render all the HTML you need. Then give each element you want to hide a unique id. You are probably using tables to create the layout you want, then you can use the table cell id to address the element.


In this case, I give the cell containing the label the id “ReasonNALabel” and the cell containing the dropdown box the id “ReasonNA”. The field ‘Recommendation’, which is the one where we are detecting the click and if it has the value “n/a” should display the two cells below it, has an id of “Recommendations”.
One more thing, we want to detect the value as soon as the page is loaded, and display/hide the section accordingly. I will break out the code that perform the check of the value and does the hide/show, so I can call one function insted of duplicating the code.
 

$(document).ready( function () {
    // Check value and do initial show/hide after page is finished loading
    refreshRecommendations();
    // Set trigger for click on radio button to call function
    $("input[name='Recommendations']").click( function() {
        refreshRecommendations();
    });
});

function refreshRecommendations() {
    var checked = $('input[name=Recommendations]:checked').val();
    if (checked == "n/a") {
        $("#ReasonNA").show();
        $("#ReasonNALabel").show();
    } else {
        $("#ReasonNA").hide();
        $("#ReasonNALabel").hide();
    }
}


If you want to check the value if a checkbox, use  $(“#checkboxID”).is(“:checked”) and to check the value of a dropdown box, use $(“#dropdownboxID”).val(). For the dropdown box, use .change() instead of .click(), otherwise the code is identical.


That is it, a few lines of jQuery to duplicate your hide-when functionality on the web.
Bonus tip: If you want the ítems to fade in and out gradually, you can use jQuery for that as well. You just replace .show() with .fadeIn(‘slow’) and .hide() with .fadeOut(‘slow’). Now you get a nice slow (about 1 second) fade effect instead of instant change.
You can also set the duration of the fade in milliseconds instead, for example .fadeIn(500) for a half-second fade. Another neat thing is that you can define a call-back function to execute after the fade is done. Below is an example of that, where one div is faded out in 750 milliseconds. When that is done, another one is faded in (for half a second) and finally a message is displayed when everything is done.
$("#Section1").fadeOut(750, function() {
    $("#Section2").fadeIn(500, function() {
        alert("Done.");
    });
});
1 Comment

End of content

No more pages to load